In Part 4 we made a self-signed certificate — encrypted but untrusted. Now we’ll build trust properly by standing up our own Certificate Authority and issuing a certificate through a real root → intermediate → leaf chain.
In this part:
- A CA is “just” a key pair + a self-signed certificate
- Build a root CA, an intermediate CA, and a leaf certificate
- Subject Alternative Name (SAN) — why modern browsers require it
- The OpenSSL extension-stripping gotcha and its fix
- Assemble the full chain and verify it
- Install on nginx and trust your CA in the browser
This is the corporate/private-CA build (the one you create yourself). For a public CA, you’d run only the leaf’s key + CSR steps and let them sign. For self-signed, you’d stop at the single cert from Part 4.
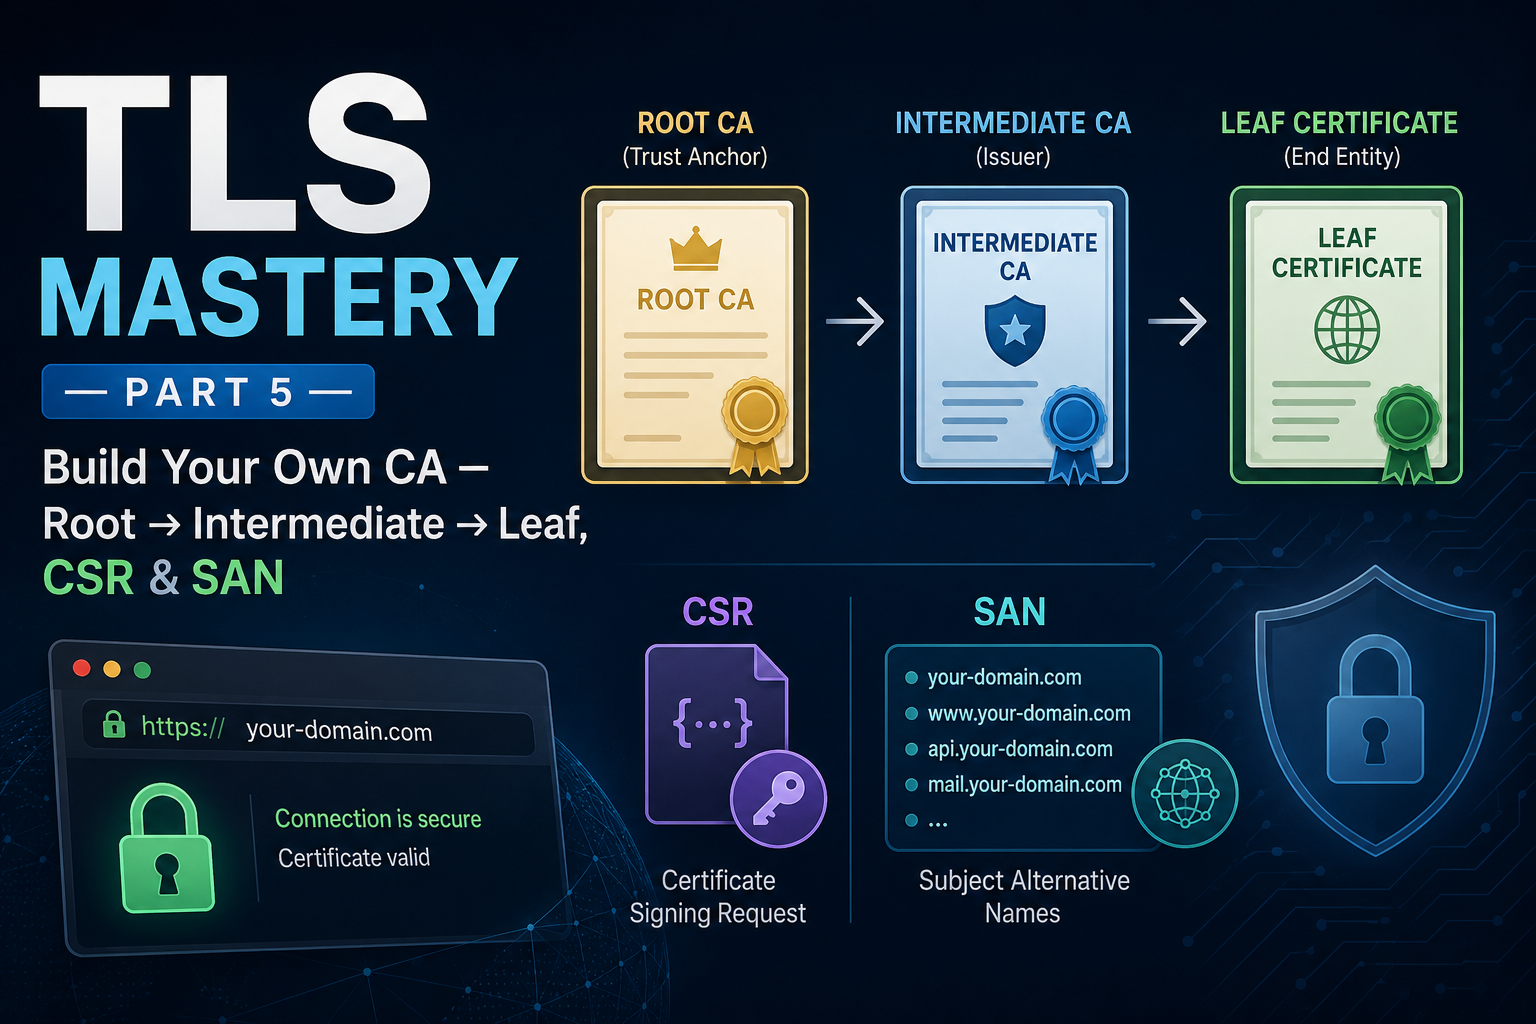
A CA is “just” a key pair + a self-signed certificate
A CA holds a public key, a private key, and a certificate — and a root CA’s certificate is self-signed (no one signs the root, because there’s no higher authority). In real life the root rarely signs leaves directly; it signs an intermediate, which does the day-to-day signing. That keeps the precious root key offline and lets a compromised intermediate be revoked without burning the root. So we’ll build all three tiers.
Root key
   |
   v
Root cert (self-signed)
   |
   | signs
   v
Intermediate cert
   |
   | signs
   v
Leaf cert (your server)          Leaf key ---- stays on server ----> Web server
Because OpenSSL needs certificate extensions supplied explicitly at signing time (you’ll see why under “the gotcha” below), we’ll use small extension files.
Step 1 — Root CA (self-signed, the top of trust)
openssl genrsa -out rootCA.key 4096

openssl req -x509 -new -nodes -key rootCA.key -sha256 -days 3650 \
  -subj "/C=IN/O=DevCorp/CN=DevCorp Root CA" \
  -addext "basicConstraints=critical,CA:TRUE" \
  -addext "keyUsage=critical,keyCertSign,cRLSign" \
  -out rootCA.crt
CA:TRUE marks it as a CA; keyCertSign lets it sign other certificates. Keep rootCA.key offline and protected — it’s the root of all trust.
Step 2 — Intermediate CA (signed by the root)
openssl genrsa -out intermediate.key 4096

openssl req -new -key intermediate.key \
  -subj "/C=IN/O=DevCorp/CN=DevCorp Intermediate CA" \
  -out intermediate.csr
Create intermediate.ext:
basicConstraints = critical, CA:TRUE, pathlen:0
keyUsage         = critical, keyCertSign, cRLSign
(pathlen:0 means this intermediate can sign leaves but not further sub-CAs.) Sign it with the root:
openssl x509 -req -in intermediate.csr \
  -CA rootCA.crt -CAkey rootCA.key -CAcreateserial \
  -days 1825 -sha256 -extfile intermediate.ext \
  -out intermediate.crt
Step 3 — Leaf / server certificate (signed by the intermediate)
First the key and the CSR — the request you’d normally send to a CA. It bundles your public key with identity info (Common Name, Org, Country, email):
openssl genrsa -out app.key 2048

openssl req -new -key app.key \
  -subj "/C=IN/O=DevCorp/CN=app.dev.com" \
  -out app.csr
Never send your private key. A CA only needs the public key inside the CSR. Lose the private key and the certificate is useless.
Subject Alternative Name (SAN) — don’t skip this
Historically the domain went in the Common Name (CN) field. Modern browsers have deprecated CN for hostname matching and now require a Subject Alternative Name (SAN). A certificate with a CN but no SAN is rejected:
“NET::ERR_CERT_COMMON_NAME_INVALID”
SAN lists every name (and IP) the certificate is valid for. Create app.ext — note the SAN and that this is not a CA:
basicConstraints = CA:FALSE
keyUsage         = critical, digitalSignature, keyEncipherment
extendedKeyUsage = serverAuth
subjectAltName   = DNS:app.dev.com, DNS:www.app.dev.com
SAN is not a wildcard. A wildcard (
*.example.com) matches subdomains by pattern; SAN is an explicit list of specific names/IPs.
The gotcha: extensions get stripped on signing
If you sign the CSR without re-supplying extensions:
openssl x509 -req -in app.csr -CA intermediate.crt -CAkey intermediate.key \
  -CAcreateserial -out app.crt -days 397
…then decode app.crt — the SAN is gone! OpenSSL drops requested extensions during signing. The CSR had SAN, but the issued certificate doesn’t, so the browser still rejects it. (This is also why Step 2 used an -extfile for the intermediate’s CA:TRUE.)
The fix: pass the extension file at signing time. Sign the leaf with the intermediate (not the root):
openssl x509 -req -in app.csr \
  -CA intermediate.crt -CAkey intermediate.key -CAcreateserial \
  -days 397 -sha256 -extfile app.ext \
  -out app.crt
(397 days reflects the public-CA maximum for leaves; an internal CA can choose its own policy.) Confirm the SAN survived:
openssl x509 -in app.crt -noout -subject -issuer -ext subjectAltName
                                   sign WITHOUT -extfile --> Cert (SAN stripped) ✗
CSR (has SAN)  ---|
                   \
                    sign WITH -extfile ----------------> Cert (SAN kept)     ✓
Assemble the full chain and verify
Servers send leaf first, then intermediate(s) — never the root:
cat app.crt intermediate.crt > fullchain.crt

# Verify the whole path locally (expected: app.crt: OK)
openssl verify -CAfile rootCA.crt -untrusted intermediate.crt app.crt
What goes where:
fullchain.crt (leaf + intermediate) ---> Web server / Ingress Secret
app.key ---------------------------------/

rootCA.crt ---> Client / system trust store
The server gets fullchain.crt + app.key. Clients must trust rootCA.crt; they don’t need the intermediate separately — the server sends it.
Install on nginx and trust your CA
Point nginx at the chain and key, then restart:
ssl_certificate     "/etc/pki/nginx/fullchain.crt";
ssl_certificate_key "/etc/pki/nginx/private/app.key";
sudo cp fullchain.crt /etc/pki/nginx/fullchain.crt
sudo cp app.key /etc/pki/nginx/private/app.key
sudo systemctl restart nginx
For testing, map the name to your server in the hosts file (C:\Windows\System32\drivers\etc\hosts on Windows, then ipconfig /flushdns; /etc/hosts on Linux/macOS):
1.2.3.4 app.dev.com www.app.dev.com
Browse to https://app.dev.com. You’ll still see “Not secure” — the certificate is real and CA-signed, but the browser doesn’t trust your root yet. Import rootCA.crt:
Settings → Privacy and security → Security → Manage certificates → Trusted Root Certification Authorities → Import
Refresh — padlock, “Connection is secure”, issued to app.dev.com, signed by your CA.
In organisations, IT distributes the internal root to every managed device automatically, so internal HTTPS “just works” for employees. (We automate all of this with cert-manager in Part 7.)
x509 decoding cheat sheet
A certificate is wrapped between -----BEGIN CERTIFICATE----- and -----END CERTIFICATE----- (both lines required).
openssl x509 -in app.crt -text -noout   # decode a certificate (x509)
openssl req  -in app.csr -text -noout   # decode a CSR (it's a request)
Coming up
You can now build a full root → intermediate → leaf chain, issue SAN-correct certificates, dodge the extension-stripping trap, and earn the green padlock.
In Part 6 we cover the real-world bits the tutorials skip: certificate file formats (PEM/DER/PFX), revocation (CRL/OCSP/stapling), Let’s Encrypt + ACME for free automated certs, and HSTS.
Previous: Part 4 — Hands-On OpenSSL: Self-Signed Cert + nginx « · Next: Part 6 — Formats, Revocation, Let’s Encrypt & HSTS »