Parts 1–3 covered theory. Now we get our hands dirty with OpenSSL.
In this part:
- Certificate types (single-domain, wildcard)
- What a CSR is, and the standard workflow
- Create a self-signed certificate with OpenSSL
- Enable TLS on nginx and inspect the result
Certificate types
Single-domain — issued for exactly one domain, e.g. www.google.com. All URL paths under it (/gmail, /youtube) are covered automatically; paths don’t need separate certificates.
Wildcard — covers a domain and all its subdomains via an asterisk: *.google.com.
            *.google.com
           /      |      \
mail.google.com  drive.google.com  sheets.google.com
Note: a wildcard covers one level of subdomain.
*.google.commatchesmail.google.combut nota.b.google.com. There are also multi-domain (SAN) certificates that list several specific names — more on SAN in Part 5.
What is a CSR?
To get a certificate from a CA, you don’t hand over a bare public key — you send a Certificate Signing Request (CSR). A CSR bundles your public key with identity info:
- Common Name (the domain, e.g.
mynginx.com) - Organisation, Organisational Unit
- Country, State, Locality
- (and the public key)
  Private key                      Domain, Org, Country, Email
  (never leaves your server)                   |
         |                                     |
  derives public key                           |
         v                                     |
     Public key  +---------------------------+
                  \                         /
                   v                       v
                         [CSR file]
                              |
                           send to
                              v
                  [Certificate Authority (CA)]
                              |
                       verifies + signs
                              v
                     [Signed certificate .crt]
                              |
                              v
                     [Install .crt on server]
                     (private key already there —
                      never sent anywhere)
The CA reads the CSR, verifies you own the domain, checks the details, and only then issues a signed certificate.
Never send your private key. The CA only needs your public key (inside the CSR). Lose the private key and the certificate is useless.
How a CA verifies you
- WHOIS lookups for domain ownership (try who.is — registrar, dates, country, org; emails are usually hidden).
- Emailing the address in the CSR.
- Checking government/business registries; sometimes requesting documents.
The standard workflow
1. Generate private key
         |
         v
2. Generate CSR
         |
         v
3. Send CSR to CA
         |
         v
4. CA verifies and signs
         |
         v
5. CA returns .crt
         |
         v
6. Install .crt + key on server
There’s no separate “public key” step — the public key lives inside the CSR.
Hands-on: nginx over plain HTTP first
sudo yum install nginx -y
sudo systemctl enable --now nginx
sudo systemctl status nginx
nginx serves from /usr/share/nginx/html and configures from /etc/nginx/nginx.conf. Open port 80, browse to the server, and you’ll see the default page marked “Not secure” — no certificate yet.
Create a self-signed certificate
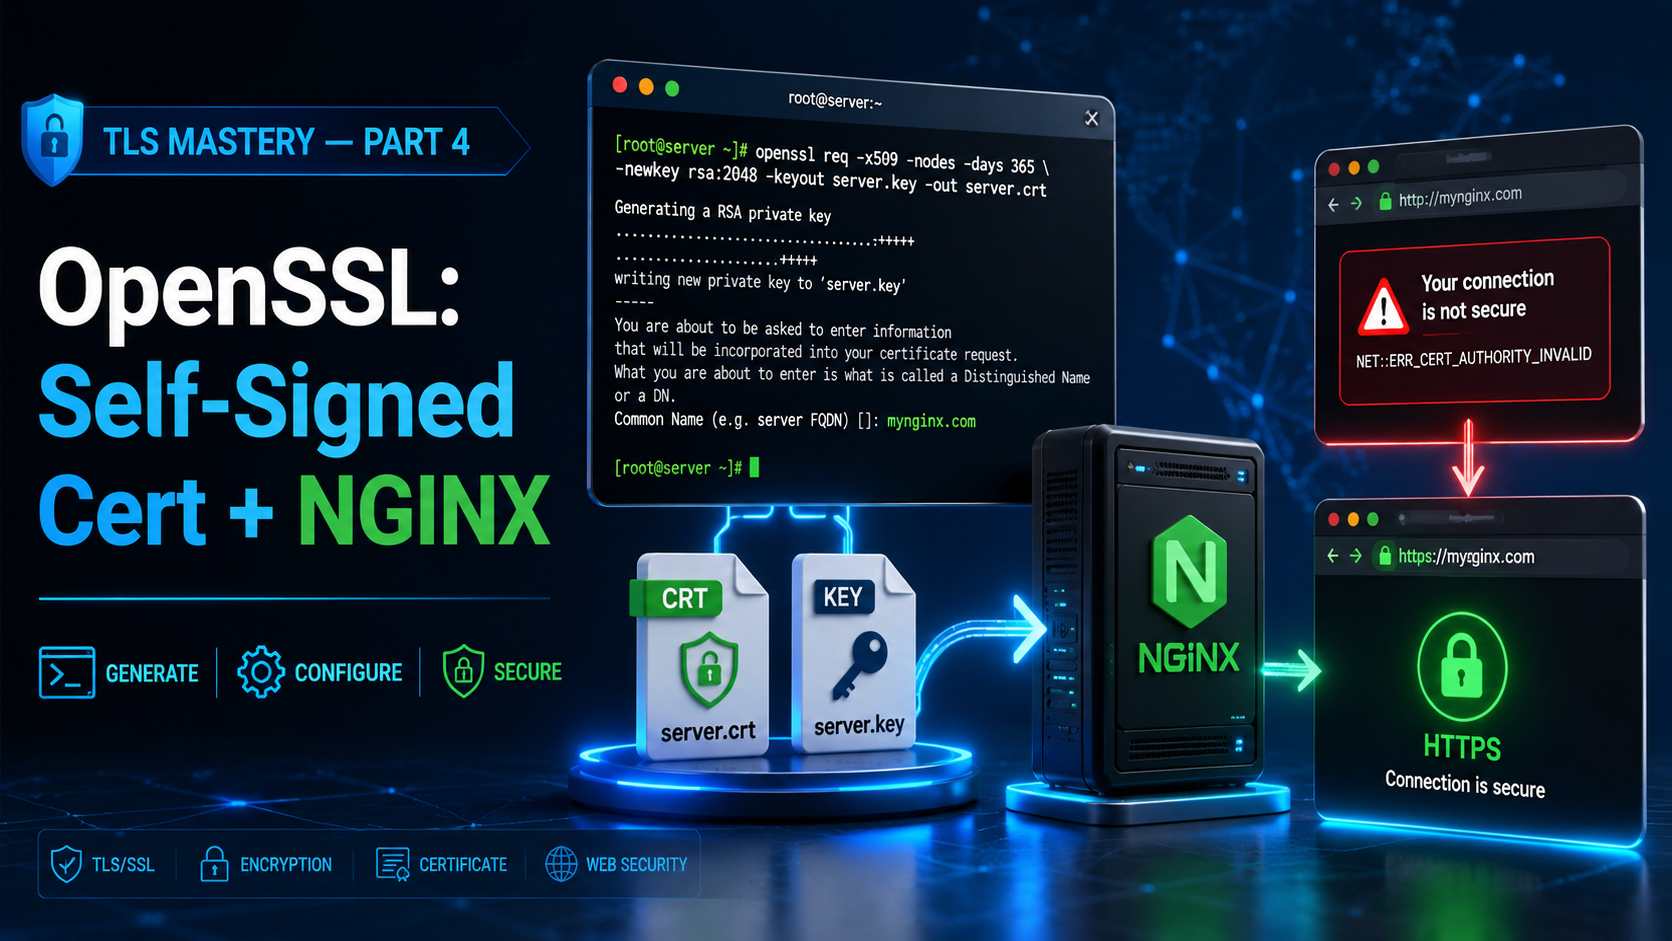
We’re not sending anything to a CA, so we don’t need a separate CSR file — OpenSSL can create the private key and self-signed certificate in one command:
openssl req -x509 -nodes -days 365 -newkey rsa:2048 \
  -keyout domain.key -out domain.crt
Flag by flag:
req— work with a certificate request.-x509— output a self-signed certificate (not just a CSR).-nodes— “no DES”: don’t lock the key with a passphrase.-days 365— valid one year.-newkey rsa:2048— new 2048-bit RSA key.-keyout/-out— where to write the key and certificate.
OpenSSL prompts for details; the Common Name is the domain, e.g. mynginx.com. Internally it creates a temporary CSR, signs it with your key, and discards it — so no .csr file appears.
The long way (to see the moving parts)
# 1) private key
openssl genrsa -out domain.key 2048
# 2) CSR
openssl req -new -nodes -key domain.key -out domain.csr
# 3) self-sign the CSR with your own key
openssl x509 -req -in domain.csr -signkey domain.key -out domain.crt -days 365
Use
domain.*/server.*names for server certificates — notuser.*(those are client certificates, covered in Part 7).
Enable TLS in nginx
Open /etc/nginx/nginx.conf. The default server block listens on port 80; near the bottom is a commented-out “Settings for TLS” block listening on 443 ssl. The pattern:
- Comment out the plain HTTP
server { listen 80; ... }block. - Uncomment the TLS
serverblock. - Point it at your certificate and key:
server {
    listen       443 ssl;
    listen       [::]:443 ssl;
    server_name  mynginx.com;

    ssl_certificate     "/etc/pki/nginx/server.crt";
    ssl_certificate_key "/etc/pki/nginx/private/server.key";
    # ...
}
Move your files into the expected paths (renaming to server.crt / server.key):
sudo mkdir -p /etc/pki/nginx/private
sudo mv domain.crt /etc/pki/nginx/server.crt
sudo mv domain.key /etc/pki/nginx/private/server.key
sudo systemctl reload nginx
Open port 443, then browse to https://your-server. You’ll see:
“Your connection is not private — NET::ERR_CERT_AUTHORITY_INVALID”
That’s expected. The traffic is encrypted (note https://), but you signed the certificate, not a trusted CA — so the browser can’t verify identity. Click Advanced → Proceed.
Decode the certificate to see the problem
openssl x509 -in /etc/pki/nginx/server.crt -text -noout
(-noout hides the raw public-key blob.) Look at two fields:
- Subject — info about this certificate (your Common Name, org).
- Issuer — who issued it.
For a self-signed certificate, Subject and Issuer are identical — you issued your own certificate. That’s exactly why the browser won’t trust it, and why the certificate hierarchy shows no CA above it.
Coming up
You can now create a self-signed certificate and serve HTTPS from nginx — encrypted, but untrusted.
In Part 5 we’ll fix the trust problem the right way: build our own Certificate Authority, generate a proper CSR, handle Subject Alternative Names (SAN) (and the classic OpenSSL gotcha), and get the green padlock by trusting our CA in the browser.
Previous: Part 3 — The TLS Handshake, Classic & Modern « · Next: Part 5 — Build Your Own CA »